🔗 Connect with Confidence!
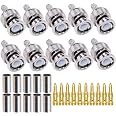
The TUOLNK BNC Male Connector pack includes 10 high-quality connectors designed for RG6, RG58, and RG142 coaxial cables. Made from durable nickel-plated brass with pure copper pin contacts, these connectors ensure optimal signal transmission and are perfect for a variety of applications including CCTV, WiFi radios, and more. With a 12-month warranty and a commitment to quality, these connectors are built for professionals who demand reliability.
J**E
Great for repairing BNC cables!
BNC cables are the industry standard connector in the film industry, however, they're pretty expensive, especially short lengths of cable, and also they're quite fragile so break often! So a great skill to learn it crimping your own - you can buy lengths of cable without ends attached quite cheaply and make your own, or you can repair existing ones by cutting off the end and crimping a new one on (as it's usually the ends of cables that go!).There's not a lot to say about this kit other than it works as intended! It's pretty affordable, and they seem like high quality connectors, and work without issue. You need a crimping kit to use them of course, and crimping is a skill to get right, but if you want to start learning then this is a great buy!
M**E
These do not fit RG6 cable. The end does not fit over the inner insulation.
After stripping the RG6 coax cable with a Klein Tools stripper, the end of the fitting does not fit over the inner insulation. See attached pictures.
石**井
サイズ注意
3C-2V用ではありません。リングが入らない(>_<)
S**E
Great Value generic BNC connector
Great value, easily fixed, fits to signal generator with no issues.
B**A
Crimp + Solder BNC connectors for RG58 varieties
At around half the price of 'top brand' connectors these are well worth a look.I tried them on RG58 C/U 'stranded centre' copper cable.After threading the outer barrel onto the cable (!) strip back the outer insulation by about 15mm and the inner insulation by 2 - 3 mm.Then check the overall lengths will all line up with the tip of the pin level with the front insulation of the plug (see pic) and the trimmed braid at the end of the 'chimney bit' A bit of fine adjustment might be needed.Once its OK the centre pin now needs carefully soldering (as excess solder will stop it inserting into the plug's white insulation). The Centre pins do not lock or click into place so whne you inser the pin into the plug body double check that the pin is fully forward in its working position (See pic) before sliding the barrel over the trimmed to size braid, re-checking the pin and firmly crimping the outer barrel with the correct crimping tool.Anyway it all went plan and a nicely finished plug was the swift result
Trustpilot
1 day ago
1 week ago